Logo

E-Commerce

We can add e-commerce to your website so that you can securely sell products. Payment gateways include PayPal (sign up here) and Authorize.net (sign up here). We will teach you to easily manage the categories, sub-categories, and product data yourself. We will build a custom e-commerce system for your website with functionality specific to your business' needs.

Ever wondered how to sell products from your website? Here's a 6-minute video where Karen Pittman, Project Manager of PD/GO Digital Marketing, explains how easy it is to add E-Commerce to your PD/GO Version 4 website!

Video Transcript

For a fully keyboard-accessible alternative to this video, view it in Chrome or on any Android or iOS device, view it in Firefox with the YouTube ALL HTML5 add-on installed, or disable Flash in Internet Explorer.

Hello everyone, my name is Karen Pittman. I am the Project Manager for a PD/GO Digital Marketing. In this video, I will show you how to set up an online store and add products to your store on your website using version 4 of the PD/GO System. The first thing you'll want to do is log into the Web Manager. There are a couple of steps you need to take in order to get your eStore set up. We'll go here to Web Pages. There are three pages that you need to set up initially in order to get your online store going. You have a Checkout Page, an Order Success Page, and an Order Failed Page. So we will go in to edit the Checkout Page. What we need to do here is, we need to add a Checkout Core Widget to this page. In order to do that. we will click on Insert, then go to the Widget section, select Checkout and drag it into the Editor on the page and you will see that your Shopping Cart will appear. Of course, it's empty now as we haven't added any products to our cart so let's go ahead and Publish changes.

We'll go back out to our list of pages. The Order Success Page is a page with a short message that will let your user know that they have successfully made a purchase on your site. I have that set up here. You can see it says, “Your Order has been successfully processed.” If there is a problem with the purchase being processed on your site, the Order Failed Page will send a message to the customer and there's just a short message to let them know that the process failed and I have that set up here.

The next thing we need to do is go to Website Settings. once we are in website settings we want to go to the Checkout Orders option. So here where it says Paypal email, you want to make sure that you enter the email address that is associated with a PayPal account that you would like the funds to be transferred to. So we click on this field and you will enter that email address here and click Save.

A couple of other settings in this section also need to be in place. We will go here to Order Success Page, this is where we would select the page we set up for this purpose. Do the same for Order Failed page, click here and select the page we set up for this purpose. There's several other options here that we can go into detail on in another video. For the purposes of this video, we just want these main fields filled in.

Let's go back out so now we can create a product. to add to our online store that we just setup. In order to do that we are back at the main page of the Web Manager. We will scroll down, under the Storage items section and select Product. we will click, 'Add Product' to add a new product. We will call it 'Test Product'. If we wanted to change the name, you could click this button for Rename Products and change it to what every you like. In this video, we will set up a quick simple product. So I have that selected. So in order to do that I just need to set what my price will be. Let's say $75 and enter in that amount. Click Save. The only other field I really need to fill in is the number in stock and the reason why we do this is if you do not put numbers in this field, it will actually display an error message on our product page saying that we are out of stock on our product and we don't want that, so I just put in several ones and that will prevent that from happening. So these are the basic items that need to be filled in to setup a simple product. Now that we have that done we can click out of here.

So now that we have our product created I'm going to go back to Web Pages. I've created a page here called 'My Products'. I'm going to double-click it to Edit this page. There are a few things that I have already set up on this page just for layout purposes and making things look nice, so I've added a page title here, a little column layout with an image of a portfolio that we are going to sell and then the title of the product. What we're going to do now is we're going to actually add the product that we just created onto this page. To do that we click Insert, we go to the Product storage area here and select our Test Product that we created. I'm going to just drag it right underneath the product name. You'll see the price that we set is there, $75 and then we have our Add to Cart button that appears as well. So I'm just going to Publish changes. This is how the product page displays in the web browser. We have image, the title, the price, and the Add to Cart button, so if I click the Add to Cart button it takes me to the Checkout Page that we created. The Checkout Page has the product name (Test Product is what we named it), the number of this item that I want. I can change this quantity, let's say I want 3 and I click update quantities and it changes my total here. Then when I click on Checkout with PayPal, this takes the user to the payment page for your business PayPal account. They can log in and pay with their own PayPal account if they have one or they can check out as a guest and fill in their credit card information and billing information and pay directly through PayPal that way. That is it for setting up an online store and adding products to your store in version 4 of the PD/GO System. We hope that you found this video to be helpful.

Visit John Rosemond
Visit Best Path Light.com.  This link opens new window.
Visit Mow Ox Usa. This link opens new window.
Visit EKO Designer Trash Cans. Opens new window.

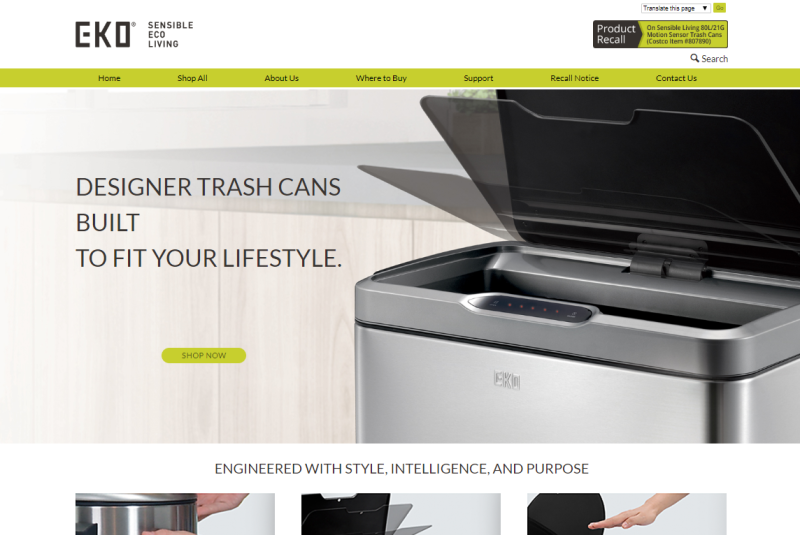
I had the pleasure of working with PD/GO DIGITAL MARKETING to update a client’s website to enable ecommerce functionality and improve usability. Everyone I worked with at PD/GO was knowledgeable and extremely helpful – from the account management to development to IT support, this was a group of professionals I would be happy to do business with again. In addition to the great customer support, the backend system they built for website development is second to none. Easy to learn, easy to use, and simple to navigate.

Brandon LaBar, Pure Play Ecommerce Consulting LLC
Client's website: www.ekousa.com

PD/GO Website E-Commerce Features

Create products of many different types

You can set up simple products or products that have multiple choices, such as color and size. You can sell digital products like ebooks, software or other downloads or set up a product that allows a customer to make a donation.

Add Thousands of Products

PD/GO Version 4 is designed to handle thousands of products allowing multiple choices with products. You can add a list of variants for your products, each with its own price and inventory.

Add a Product Anywhere

Product pages are like any other kind of page on your PD/GO website. You can add pictures, text and any other layout items to your page as normal; you don't need to follow a template for your product pages.

Use Product Images as Choices

Connect images to products to let customers choose an image variant for a product, each with its own price and inventory. Even combine with a list of secondary multiple choices. Ideal for selling photo prints at different sizes for example.

Allow Detailed Product Customization

Connect a contact form with a product to let customers enter detailed customization data for their product order. Includes file uploads, drop down menus, etc.

Inventory Control

Set a number of products you have in stock. The inventory level displays on your site and automatically counts down as products are sold.

Quick Duplicate

Quickly duplicate a product with one click to add multiple products that are similar.

Add shipping costs

A PD/GO v4 website includes a flexible system to define various shipping rates. You specify a shipping amount per product. To add volume-based discounts. you can reduce the unit-price of products if the customer adds increasing quantities of the item to their basket.

Set Your Currency

You can choose the currency for your shop from any of PayPal's supported currencies.

Allow customers to use discount coupons

You can add coupon codes that result in a discount being applied to your customer's order.

Allow Only One in Cart

Let customers only add one of a given product to their cart, ideal for selling services. Combine with the automatic inventory control to handle selling of one-of-a-kind items.

Checkout and Mini-basket

Show a mini-basket on all pages and add your main checkout to any page. Customers can change quantities, remove products and checkout through PayPal or Authorize.net.

Customize Checkout

Create your own successful and failed payment pages to guide your visitors through the checkout process.

Reorder Cart

Optionally allow customers to easily re-add their order to their shopping cart by clicking a link in their 'order received' email. This will add their products to a new shopping cart where they can edit it and/or proceed to the checkout to order the products again (ideal for online grocery shops).

Create digital invoices to send to your customers

If your business requires an invoice to be generated for each sale, you can set up a special invoice page in your website. This allows your customers to receive a link to their invoice when they are sent their 'order received' or 'order sent’ email.

Email Templates

Keep customers in the loop by defining email templates to be sent to customers when they place an order and also when you mark an order as shipped. Use simple variables in the templates to insert customer's name, address and order details.

Emails Sent Via Your Server

Configure PD/GO to send emails to customers using your own SMTP email account. This decreases the chance of emails being flagged as spam as well as letting customers reply directly to emails.

Download Order Archive

Export order data from PD/GO as a CSV which can be imported into a spreadsheet application.